
Nikon Coolpix P500 Instruction Manual: A Comprehensive Guide
Welcome! This guide helps you master your Nikon COOLPIX P500․ It covers camera features, basic operation, and troubleshooting․ Thank you for choosing Nikon!
The Nikon Coolpix P500 is a digital camera designed for users seeking a blend of versatility and performance․ This comprehensive instruction manual is crafted to assist you in maximizing the potential of your COOLPIX P500․ Nikon COOLPIX cameras are designed to the highest standards and include complex electronic circuitry․
Whether you’re a beginner or an experienced photographer, this guide provides step-by-step instructions and helpful tips to navigate the camera’s features․ Learn how to capture stunning images, explore various shooting modes, and optimize settings for different scenarios․ This manual will walk you through everything, ensuring a seamless and enjoyable photography experience․ By familiarizing yourself with the information provided, you’ll be well-equipped to unlock the full creative capabilities of your Nikon Coolpix P500․
Let’s embark on this journey together, transforming you into a confident and skilled photographer with your COOLPIX P500․
Overview of Features and Specifications
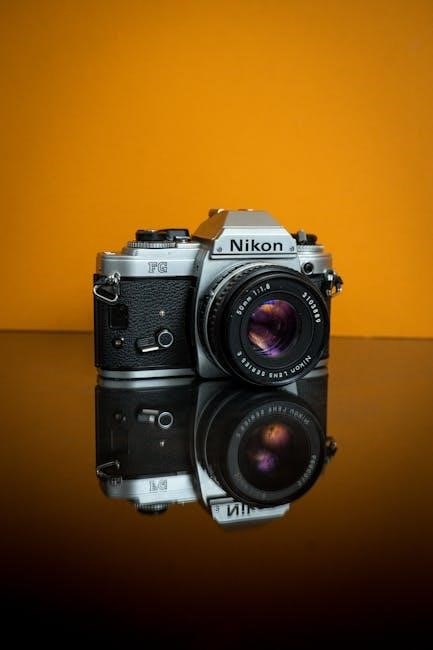
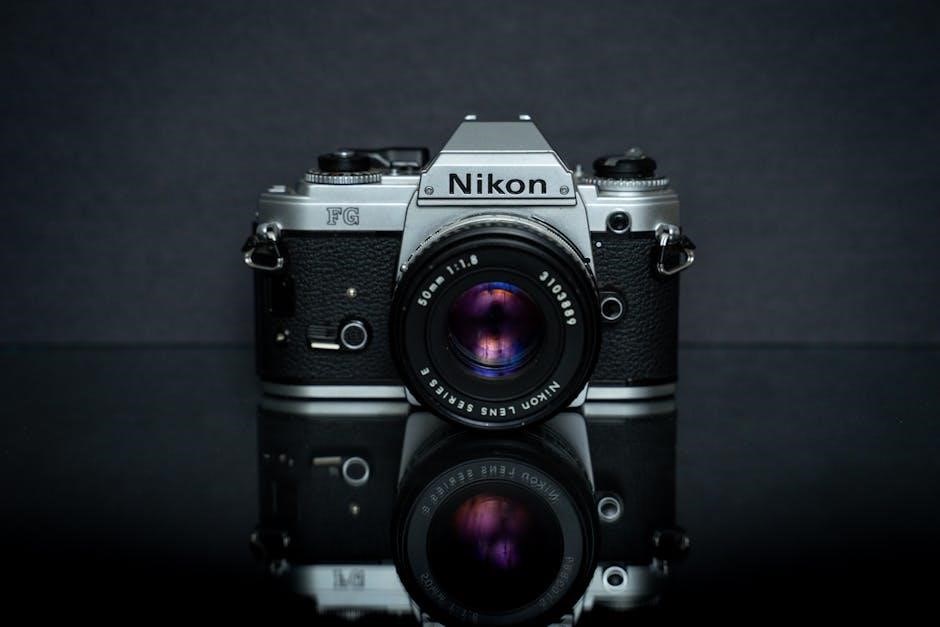
The Nikon Coolpix P500 boasts a range of impressive features designed to enhance your photography․ At its core is a 12․1-megapixel CMOS sensor, delivering high-resolution images with excellent clarity․ With its incredible 36x optical zoom lens, it allows you to capture distant subjects․
The camera also offers a broad ISO sensitivity range, from 160 to 3200, enabling effective low-light photography․ Image stabilization minimizes blur caused by camera shake, ensuring sharp and steady shots․ Furthermore, the Coolpix P500 features various shooting modes, including auto and scene modes, catering to different shooting conditions․
It also supports Full HD video recording, allowing you to capture high-quality videos․ Other notable specifications include a high-resolution LCD screen for easy viewing, and compatibility with SD memory cards for ample storage․ The P500 combines powerful performance with user-friendly design, making it an excellent choice for photographers of all skill levels․
Sensor and Image Quality
The Nikon Coolpix P500 features a 12․1-megapixel CMOS sensor, a crucial component in capturing high-quality images․ The CMOS sensor excels in gathering light, resulting in clear, detailed photographs even in challenging lighting conditions․ This sensor contributes significantly to the camera’s ability to produce images with accurate colors and minimal noise․
With the P500, you can expect images that are sharp, vibrant, and rich in detail․ The high megapixel count allows for significant cropping and enlargement without sacrificing image quality․ The camera’s image processing system works in tandem with the sensor to optimize image quality, ensuring that your photos are visually appealing․
Whether you’re shooting landscapes, portraits, or close-ups, the Coolpix P500’s sensor and advanced image processing deliver consistent and reliable results․ Expect photos with clarity and detail, making it a reliable tool․
Lens and Zoom Capabilities
The Nikon Coolpix P500 boasts a remarkable lens with exceptional zoom capabilities․ Its 36x optical zoom allows users to capture stunning close-ups of distant subjects․ The lens offers a versatile range from wide-angle to super-telephoto, making it suitable for various photographic scenarios․
The lens’s aperture range of f/3․4 to 5․7 allows for decent light gathering․ This allows for clear and bright images, even in less-than-ideal lighting conditions․ The lens construction incorporates high-quality elements to minimize distortion and aberrations, ensuring sharp and accurate images across the entire zoom range․
Combined with the camera’s image stabilization system, the lens enables users to capture steady shots, even when fully zoomed in․ Whether you’re shooting landscapes or wildlife, the Coolpix P500’s lens and zoom capabilities offer a powerful and flexible tool․
ISO Sensitivity and Image Stabilization
The Nikon Coolpix P500 offers a wide ISO sensitivity range, from ISO 160 to 3200․ This allows photographers to adapt to various lighting conditions․ Lower ISO settings, like ISO 160, are ideal for bright, outdoor scenes, minimizing noise and maximizing image detail․ Higher ISO settings, such as ISO 3200, are useful in low-light situations, allowing for shooting without a flash․
However, keep in mind that higher ISO settings can introduce more noise into the image․ The P500 also features advanced image stabilization technology, which minimizes blur caused by camera shake․ This is especially useful when shooting handheld, particularly at longer zoom lengths or in low light․
The image stabilization system helps to produce sharper and clearer images, ensuring that your photos are crisp and detailed, even in challenging shooting conditions․ It works in conjunction with the lens to provide optimal stability․ This makes the Coolpix P500 a great choice for capturing sharp images․
Basic Operation and Setup
Getting started with your Nikon Coolpix P500 is straightforward․ Begin by inserting a charged battery and memory card․ The power button, located on the top, turns the camera on and off․ Upon initial startup, you will be prompted to set the date and time․ Accurate date and time settings are crucial for organizing your photos․
The camera’s menu system is accessed via the menu button, providing access to various settings․ Navigating through menus is done using the multi-selector dial․ The display screen shows shooting information, including ISO and image stabilization․ Familiarize yourself with these basic functions to optimize your photography experience․
Understanding these initial steps ensures you can quickly begin capturing memories․ The Nikon Coolpix P500 is designed for user-friendly operation․ Proper setup ensures accurate organization, and easy navigation․ The multi-selector dial simplifies menu interactions․ Learning basic functions enhances photo quality and enjoyment․
Powering On and Off
The power button on your Nikon Coolpix P500 is your gateway to capturing stunning images․ Located conveniently on the camera’s top panel, pressing it firmly initiates the power-on sequence․ The LCD screen will illuminate, displaying essential shooting information․ To power off the camera, simply press the same button again․ Ensure the lens retracts fully before storing the camera to protect it from damage․
Properly powering down conserves battery life and protects the lens mechanism․ When not in use, always turn off your Coolpix P500 to maximize battery performance․ Remember, leaving the camera on unnecessarily drains power․ Protect the lens from dust and scratches․
Pay attention to the power indicator light․ A green light indicates the camera is on․ No light indicates it’s off․ This simple step preserves your camera and extends its lifespan․ Consistent operation ensures long-term enjoyment․
Setting the Date and Time
Accurate date and time settings are crucial for organizing and referencing your photos․ To set these on your Nikon Coolpix P500, begin by pressing the Menu button․ Navigate to the Setup menu using the multi-selector․ Locate the “Date/Time” option and select it․
A screen will appear, allowing you to adjust the year, month, day, hour, and minute․ Use the multi-selector to highlight each field and the OK button to confirm․ Ensuring these settings are precise is essential for proper photo cataloging․ Incorrect settings can lead to confusion when reviewing images later․ Double-check the information before exiting the menu․

Regularly verify the date and time․ Especially after battery changes or extended periods of non-use․ This simple step ensures every photo receives the correct timestamp․ Keeping accurate records of when your pictures were taken is crucial․
Navigating the Menu System
The Nikon Coolpix P500’s menu system provides access to various camera settings․ To access it, press the “Menu” button on the camera’s rear․ The menu is organized into different tabs for shooting, playback, and setup․ Use the multi-selector (the directional pad) to navigate between tabs and menu items․
Within each tab, you’ll find a list of options you can adjust․ Highlight the desired option using the up and down arrows on the multi-selector․ Press the “OK” button to select the option․ For settings with sub-menus, the “OK” button will take you to the next level․
To return to the previous menu level, press the “Menu” button again․ This will allow you to undo the changes you made․ Familiarizing yourself with the menu structure enables efficient camera customization․ It improves your overall shooting experience․
Experiment with the various settings to discover the full potential of your Coolpix P500․ Consult the manual for detailed explanations of each menu item․
Shooting Modes and Scene Selection
The Nikon Coolpix P500 offers diverse shooting modes․ These modes adapt to varied photographic scenarios․ Selecting the appropriate mode is crucial for optimal image capture․ The camera provides automatic and scene-specific options․
Auto mode simplifies the process․ The camera analyzes the scene and automatically adjusts settings․ It’s ideal for beginners or quick snapshots; However, for more control, explore the scene modes․ These presets cater to specific situations like portraits, landscapes, and sunsets․
To access these modes, locate the mode dial on the top of the camera․ Rotate the dial to choose your desired mode․ Scene modes optimize settings for specific subjects․ This ensures the best possible results in challenging conditions․
Experiment with different modes to understand their effects․ This allows you to fine-tune your photography skills․ Familiarize yourself with scene selections to enhance your creative vision․
Auto Mode
Auto Mode on the Nikon Coolpix P500 is designed for effortless photography․ The camera intelligently analyzes the scene before you․ It automatically adjusts settings for optimal exposure and clarity, simplifying the shooting process․
This mode is perfect for beginners who are learning the basics․ Also, it is good for those who need to capture quick snapshots without manual adjustments․ Simply point the camera at your subject and press the shutter button․ The Coolpix P500 handles the complexities of aperture, shutter speed, and ISO․
Auto mode excels in various lighting conditions and subject matter․ It delivers well-balanced and properly exposed images․ It is a reliable choice for everyday photography․ While Auto mode provides convenience, it offers limited creative control․
For advanced photographers, other modes provide manual settings․ This allows you to fine-tune your shots․ But, Auto mode remains a valuable tool․ It’s a great tool for capturing memories quickly and easily․
Scene Modes
Nikon Coolpix P500’s scene modes optimize camera settings for specific situations․ These modes help capture the best possible shots․ They are perfect for users who want better results than Auto Mode․ But, they don’t want to deal with manual settings․
The Coolpix P500 offers a variety of scene modes․ These include Portrait, Landscape, Sports, Night Portrait, and Sunset․ Each mode is pre-programmed with settings tailored to the scene․ Portrait mode softens skin tones, while Landscape mode enhances colors․ Sports mode uses a fast shutter speed to freeze action․
To use scene modes, select the appropriate mode from the menu․ The camera automatically adjusts settings․ This ensures optimal results․ Experiment with different scene modes to discover their unique effects․ Scene modes provide a simple way․ They help you to improve your photography in various conditions․ They are accessible and effective for photographers․
They help capture stunning images with minimal effort․
Image Review and Playback
The Nikon Coolpix P500 allows you to review and playback images directly on the camera’s LCD screen․ After taking a photo, it automatically displays for a few seconds․ Press the playback button (usually indicated by a triangle) to enter full playback mode․
In playback mode, use the multi-selector buttons to scroll through your photos․ You can zoom in to check details․ Press the zoom button to enlarge the image․ Press it again to zoom out․ The display shows information about the photo․ This includes the date, time, and shooting settings․
To delete an image, press the delete button (usually marked with a trash can icon)․ Confirm the deletion when prompted․ You can also protect images from accidental deletion․ Use the protect function in the playback menu․
The playback menu offers additional options․ Options include slideshows, rotating images, and creating albums․ These features enhance your experience․ It allows you to manage and share your photos․ It is convenient to use․
Battery Information and Replacement
The Nikon Coolpix P500 uses a rechargeable lithium-ion battery․ To maximize battery life, avoid extreme temperatures․ Turn off the camera when not in use․ Reduce LCD brightness in settings․
When the battery is low, a warning icon appears on the screen․ Charge the battery using the provided charger․ A full charge typically takes several hours․ Do not use third-party chargers․ This can damage the battery or camera․
To replace the battery, open the battery compartment․ This is usually located at the bottom of the camera․ Slide the latch to release the old battery․ Insert the new battery, ensuring it clicks into place․ Close the battery compartment securely․
Dispose of used batteries properly․ Do not throw them in the trash․ Check local regulations for recycling options․ Proper disposal protects the environment․ It prevents potential hazards․ Always use genuine Nikon batteries for optimal performance․ It ensures safety․
Troubleshooting Common Issues
Experiencing problems with your Nikon Coolpix P500? Here are solutions to common issues․ If the camera won’t turn on, ensure the battery is charged․ Check the battery compartment for proper installation․ If the screen is blank, adjust the brightness․
For blurry images, clean the lens․ Make sure the image stabilization is on․ In low light, increase the ISO․ If the zoom isn’t working, reset the camera․ Check for obstructions around the lens․
If the memory card is full, delete unnecessary files․ Transfer images to your computer․ Ensure the card is properly inserted․ If the camera freezes, remove the battery․ Reinsert it after a few seconds․
If error messages appear, consult the manual․ Visit the Nikon support website․ Search for specific error codes․ For persistent issues, contact Nikon customer support․ A qualified technician may be needed․ Always back up your photos regularly․ This prevents data loss․
Downloading Software and Firmware Updates
Keeping your Nikon Coolpix P500 updated ensures optimal performance․ Visit the official Nikon website to download the latest software and firmware; Navigate to the support section․ Find your camera model․ Look for available downloads․
Software updates may include Nikon ViewNX-i for image management․ Firmware updates improve camera functionality․ They often fix bugs and enhance performance․ Before updating, ensure your battery is fully charged․ Download the correct version for your operating system․
Follow the on-screen instructions carefully․ Connect your camera to your computer using a USB cable․ Run the downloaded file․ The updater will guide you through the process․ Do not interrupt the update․ This could damage your camera․
After the update, verify the new firmware version․ Check the camera’s menu․ If you encounter issues, consult the Nikon support documentation․ Regularly check for new updates․ This keeps your camera running smoothly․ Software enhances your overall photography experience․
Leave a Reply
You must be logged in to post a comment.